This liraglutide injection guide is meant to help you understand the basics of pen setup, technique, and aftercare. Always follow your clinician’s specific instructions and the manufacturer’s liraglutide pen usage directions. If anything here conflicts with what your clinician told you, defer to your clinician.
Why proper liraglutide injection matters
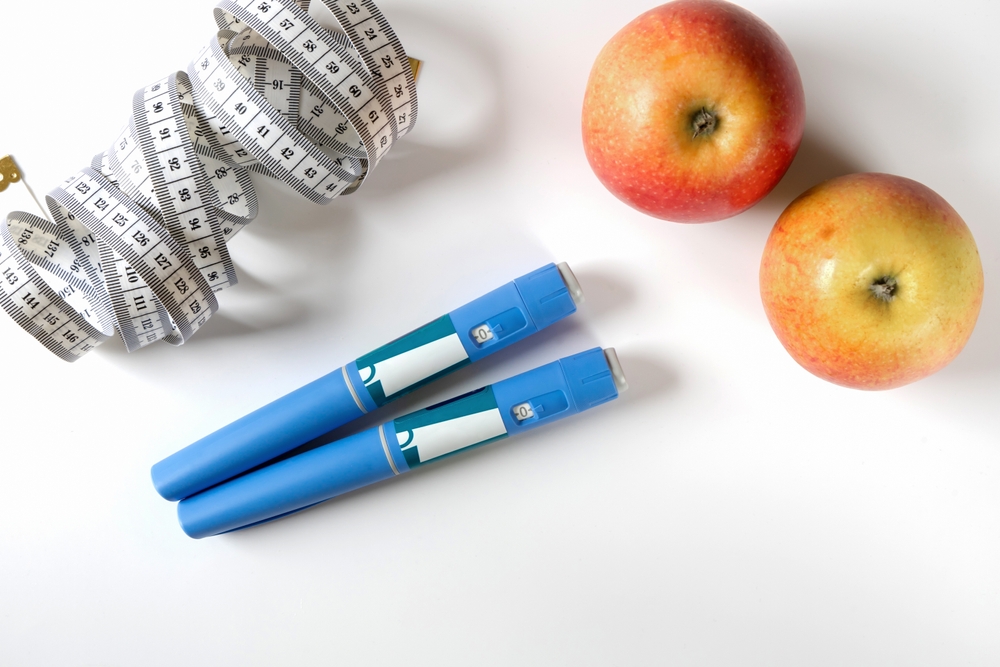
Using the correct technique may support safety and comfort, help you take the medication as prescribed, and reduce avoidable issues like skin irritation. Liraglutide for weight management (brand example: Saxenda®) is injected under the skin (subcutaneously) once daily—timing can be flexible—and typical sites are the abdomen, thigh, or upper arm. Rotating sites within the same body area may help lower the risk of skin changes (e.g., lumps).
Preparing your liraglutide pen and injection site
Before you inject, gather supplies: your liraglutide pen, a new single-use needle, alcohol swabs, a cotton ball or gauze, and a sharps container. Wash your hands thoroughly. Inspect the pen window; the solution should look clear and colorless. If it looks cloudy or you see particles, do not use that pen.
Storage matters for a safe liraglutide injection experience: keep unused pens refrigerated (36°F–46°F / 2°C–8°C). Once in use, pens can be stored at room temperature (59°F–86°F / 15°C–30°C) or in the refrigerator and should be discarded after 30 days, even if some medication remains. Do not freeze the medication or leave it in a hot car.
Step-by-step guide to injecting liraglutide
-
Wash and set up. Wash your hands. Place supplies on a clean surface. Remove the pen cap. Confirm the solution is clear.
-
Attach a new needle. Pull off the paper tab, push the needle straight onto the pen, and twist until tight. Remove both the outer and inner needle caps (keep the outer cap—you’ll need it to remove the needle later).
-
Prime (flow check) for a new pen. If it’s the first use of a new pen, turn the selector to the flow-check symbol (two dots). Point the needle up and press/hold the dose button until the counter shows “0.” Look for a drop at the needle tip. Repeat up to six times if needed; if no drop appears, change the needle and try again. Do not use the pen if a drop still doesn’t appear.
-
Set your prescribed dose. Turn the dose selector to the dose your clinician prescribed. If you overshoot, you can dial forward/backward to the correct dose. (Typical pens display 0.6, 1.2, 1.8, 2.4, or 3.0 mg.)
-
Choose and clean a site. Use the abdomen, thigh, or upper arm (stay at least ~2 inches from the navel on the abdomen). Wipe with an alcohol swab and let it air-dry. Rotate locations to give skin time to recover.
-
Insert and inject. Hold the pen so you can see the dose counter. Insert the needle at a 90° angle as you were trained. Press and hold the dose button until the counter shows “0.” Keep the needle under the skin for at least 6 seconds to help ensure the full dose is delivered.
-
Withdraw and dab. Remove the needle straight out. If you see a small drop of fluid or a little blood, gently dab (don’t rub).
-
Remove the needle safely. Place the outer needle cap back on carefully on a flat surface (one-handed technique), push it fully on, then unscrew the capped needle and place it into a sharps container. Do not put the inner needle cap back on. Replace the pen cap to protect the medication from light.
Tips for reducing discomfort and anxiety
-
Bring pens to room temp before injecting (within labeled storage limits); cooler fluid can sting more.
-
Relax and breathe. Gentle belly breathing and relaxed muscles may reduce soreness.
-
Stay consistent. Pick a time of day you can stick with; consistency may make the routine easier.
Common mistakes to avoid
-
Reusing needles. Always use a new needle to reduce contamination, clogs, and dosing errors.
-
Skipping the flow check when starting a new pen. Without priming, you may not get medication even if the counter moves.
-
Covering the dose counter with your hand while injecting, which can stop the injection. Keep the window visible.
-
Not rotating sites (injecting the same exact spot). Rotate within a region to help reduce skin changes.
-
Improper storage (freezing or overheating pens). Follow temperature and 30-day in-use limits.
Aftercare and safe disposal of liraglutide injection
After removing the capped needle, place it immediately into an FDA-cleared sharps container (or a heavy-duty household container if allowed locally) to lower the risk of needle sticks and injuries. Keep sharps containers out of reach of children and pets, and follow local rules for disposal. Replace the pen cap after every use to protect from light.
When to consult your healthcare provider
Reach out to your clinician if you’re unsure about how to inject liraglutide, have persistent injection-site reactions, notice problems with the pen (e.g., can’t complete injections, no drop during priming), or experience side effects that concern you. If more than 3 days have passed since your last dose, your clinician may advise how to restart safely. If you ever suspect a serious reaction, seek care promptly.
Heally’s role in your care
Heally’s clinicians can show you the pen steps, help you build a comfortable routine, and answer dosing and site-rotation questions. They may also review storage, travel tips, and safe sharps disposal so you feel prepared to self-inject at home.
Building confidence with liraglutide injections
With a little practice and the right setup, step-by-step liraglutide injection can become a quick, manageable part of your routine. Focus on safety (new needle every time, proper storage, sharps disposal), steady technique (visible counter, full 6-second hold), and consistent site rotation. If anything feels confusing, your care team can help you adjust your process so injections may feel more comfortable over time. Schedule a consultation with Heally today.
Sources
-
Novo Nordisk. Saxenda® Prescribing Information (administration sites; rotate to reduce cutaneous amyloidosis; visual inspection; missed-dose/restarter note). Novo Pi
-
Saxenda® official site. How to Use the Pen (storage temperatures and 30-day in-use limit; new needle each injection; do not share pens). Saxenda
-
EMA. Saxenda—Product Information (needle handling: keep outer cap to safely remove; do not recap inner cap). European Medicines Agency (EMA)
-
FDA. Best Way to Get Rid of Used Needles and Other Sharps (use FDA-cleared sharps containers; immediate disposal). U.S. Food and Drug Administration
-
GoodRx. How and Where to Inject a Saxenda Pen (flow-check symbol; 6-second hold; practical technique tips). GoodRx
Disclaimer
This information on liraglutide injections is provided for educational purposes only and should not be taken as medical advice, diagnosis, or treatment recommendation. Liraglutide is a prescription-only medication that requires individualized dosing, medical supervision, and ongoing monitoring by a licensed clinician. Safety considerations—including storage, needle handling, injection technique, and potential side effects—should always be reviewed with your healthcare provider.
Never start, stop, or change your liraglutide regimen without professional medical guidance tailored to your health history and needs. If you experience concerning side effects, difficulty using your pen, or have questions about your dosing schedule, consult your clinician promptly.
